Deploy module from source code
Installation
To get started locally, follow these instructions:
- Make sure that you have Virto Commerce Platform installed
- Make fork from the latest module source code from https://github.com/VirtoCommerce/{module-name}.git
- Clone to your local computer using
git
git clone https://github.com/VirtoCommerce/{module-name}.git
Building Module
Build Backend
Build Backend from CLI
To make a local build:
- Open console
cd src/VirtoCommerce.{module-name}.Web - Build
dotnet build -c Development
Build Backend from Visual Studio
- Open VirtoCommerce.{module-name}.sln in Visual Studio
- Build Solution
Build Frontend
Note
While building the solution the first time from the Visual Studio, npm references should be installed and webpack should be built automatically. This would be done if Web project have this nuget package added - VirtoCommerce.BuildWebpack. It adds webpack build target to the project, which create frontend bundles on initial build. In case of changing frontend part, explicit local build would be required to pack style/script bundles.
To make a local build
- Open console
cd src\VirtoCommerce.{module-name}.Web - Install the dependencies
npm ci - Build frontend application
npm run webpack:build - Watch changes
npm run webpack:watch
Initial Configuration
Add directory link to VirtoCommerce.Platform.Web\Modules, so the platform can read module manifest and load it:
mklink /d VirtoCommerce.Platform.Web\Modules src\VirtoCommerce.{module-name}.Web
Running
Restart the Platform to load the new module assemblies into the Platform's application process.
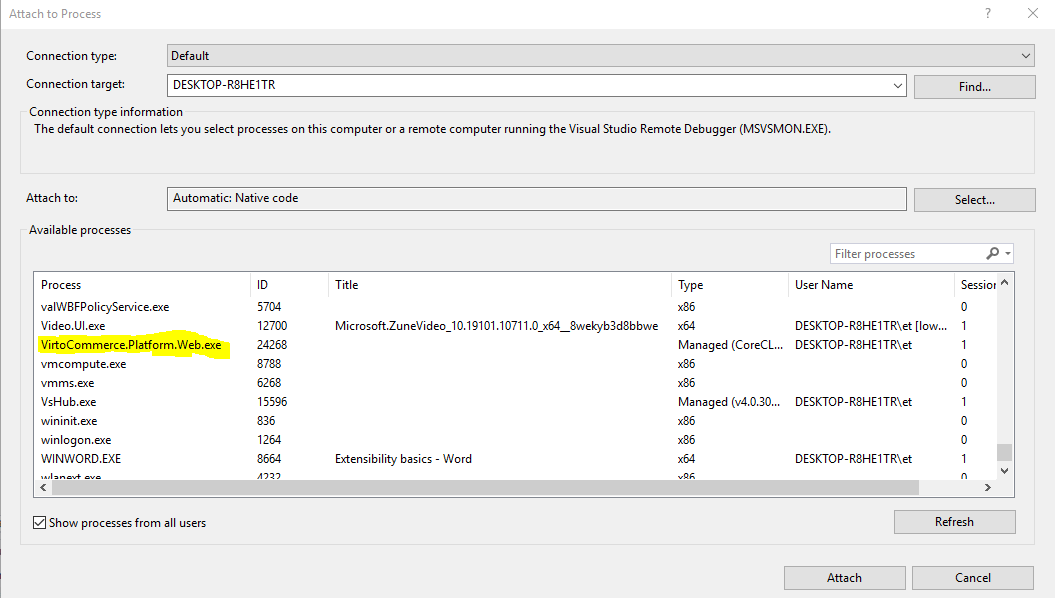
Backend Debugging
- Install and run platform as described in steps above.
- Open the module solution in Visual Studio and attach the debugger to the
VirtoCommerce.Platform.Web.exeprocess.
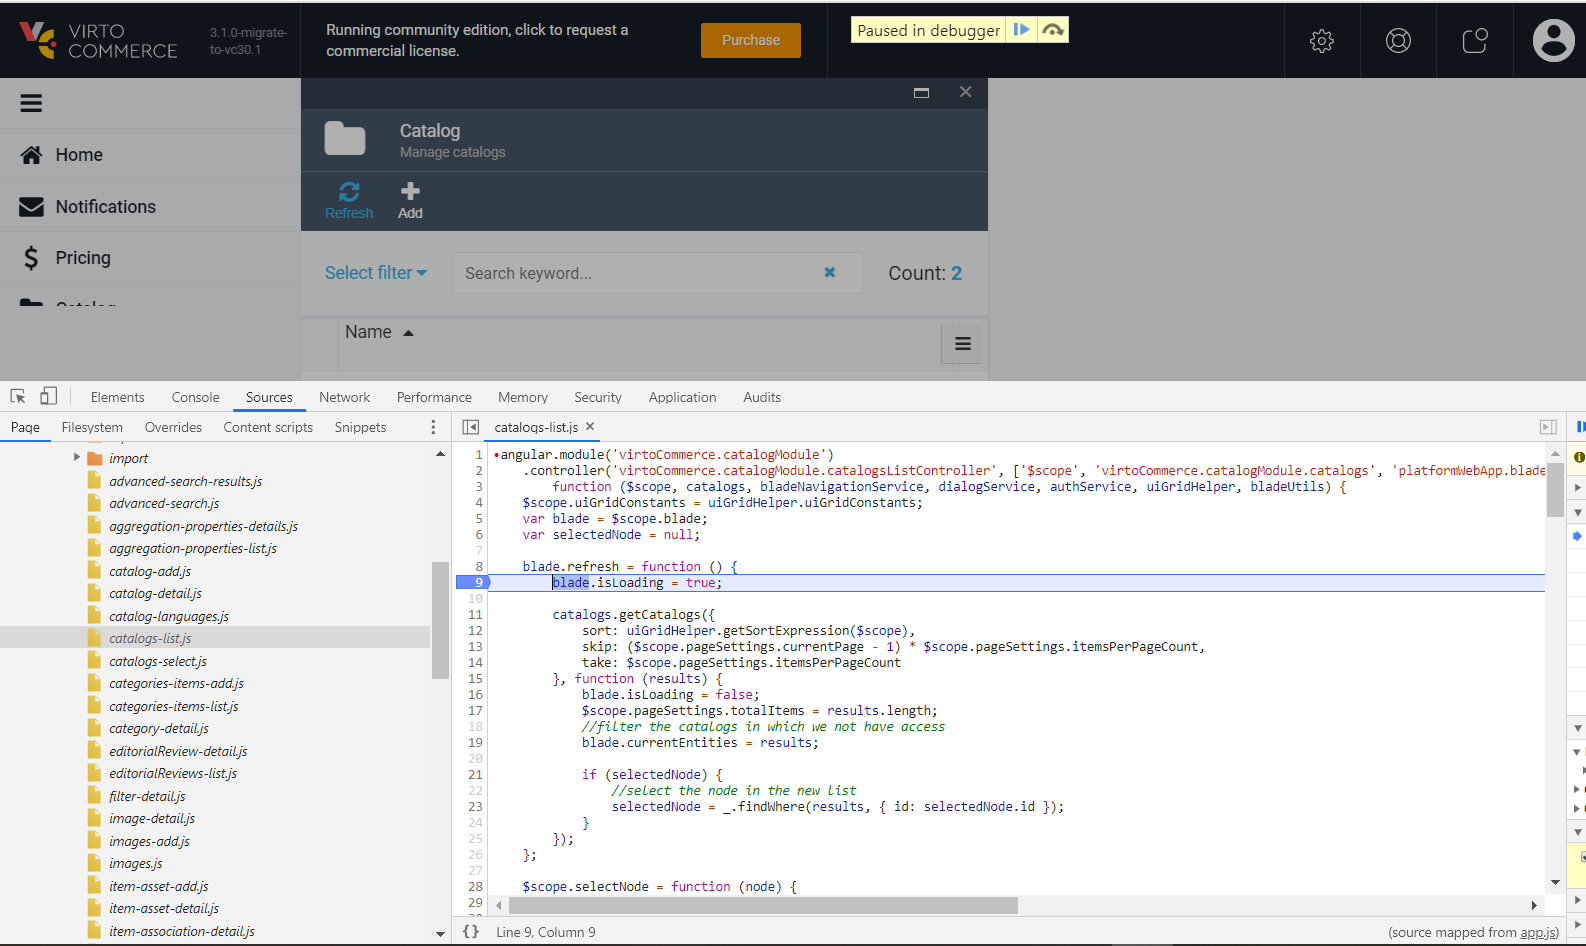
Frontend Debugging
- Frontend supports debugging in Chrome.
- Open Developer Console
- Open Source Tab
- Navigate to
{module-name}/./Script/
Testing
There is tests folder with suites which can be run locally.